- Click the “Devices” icon on the toolbar
- Select the device to be installed
- Click on the “Installation Request” icon
- Click the “Devices” icon on the toolbar.
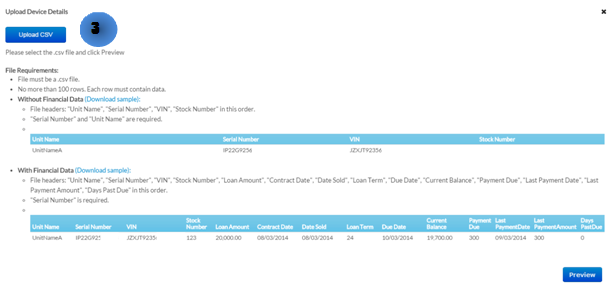
- Click on the “Upload” icon
- Click on “Upload CSV” button. Select the desired CSV file and click on “Open”
- The .cvs file without financial data should contain columns titled: Unit Name, Serial Number, VIN, and Stock Number in this order. Up to 100 records per file. Each row much contain data.
- The .cvs file with financial data should contain columns titled: Loan Amount, Contract Date, Date Sold, Loan Term, Due Date, Current Balance, Payment Due, Last Payment Date, Last Payment Amount, and Days Past Due in this order.
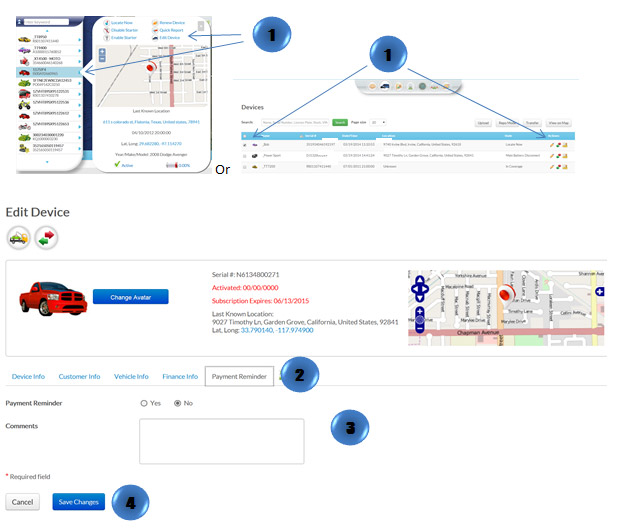
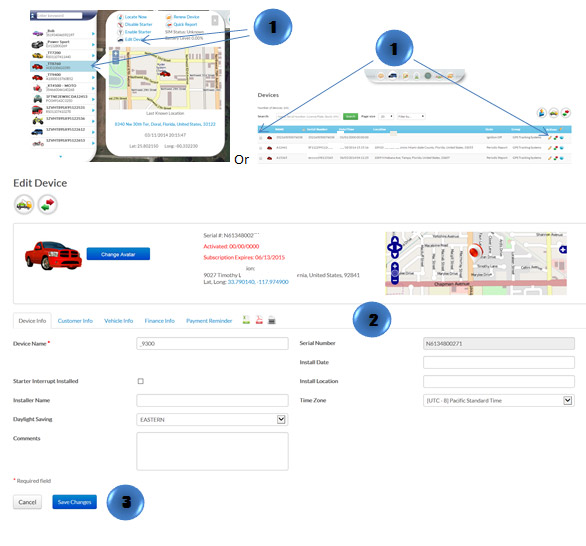
- In the Map View, select the vehicle/device to edit. Click on the blue arrow. An information bubble will appear next to the selected vehicle. Click on “Edit Device” button
Or
- Click the “Devices” icon on the toolbar. Select the vehicle to be edited. Click on “Edit” button
- Enter in all necessary information. This screen also has access to “Repo Mode”, “Transfer”, “Change Avatar,” and “Enable Payment Reminder.”
- Click on “Save Changes” button
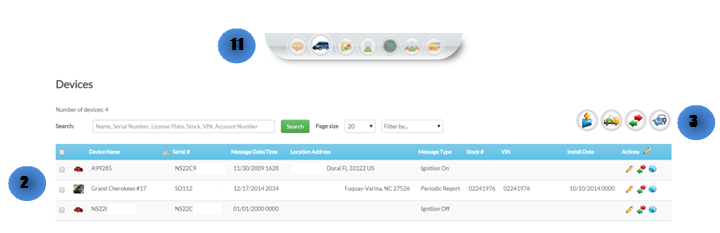
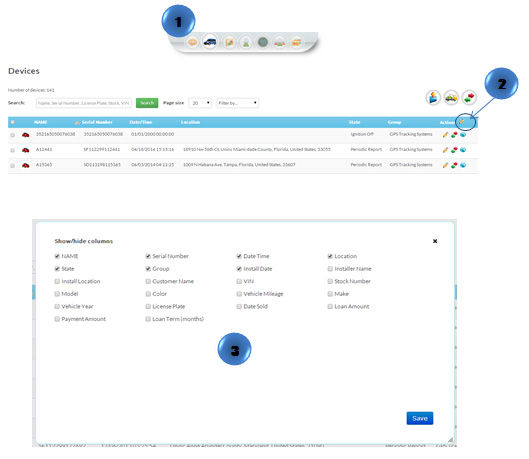
- Click the “Devices” icon on the toolbar.
- Click the pencil icon located on the bar
- A pop up window will appear. Choose the item you desire.
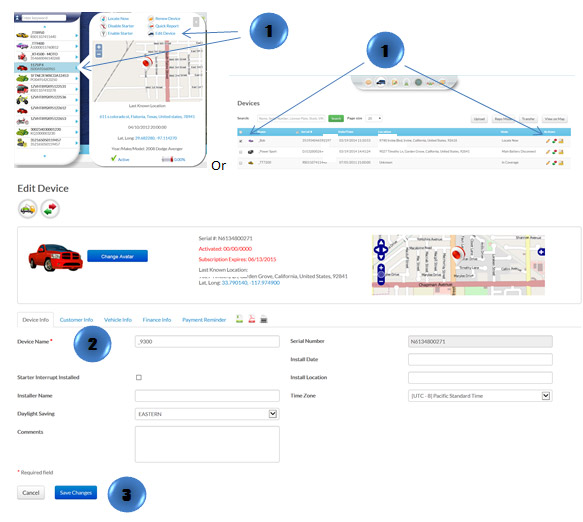
- In the Map View, select the vehicle/device to edit. Click on the blue arrow. An information bubble will appear next to the selected vehicle. Click on “Edit Device” button
Or
- Click the “Devices” icon on the toolbar. Select the vehicle to be edited. Click on “Edit” button
- Type in the new name in the device name box
- Click on “Save Changes” button
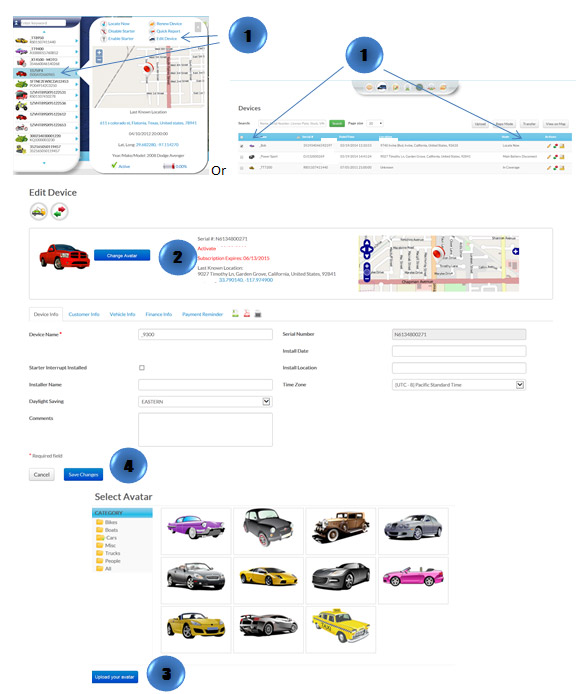
- In the Map View, select the vehicle/device to edit. Click on the blue arrow. An information bubble will appear next to the selected vehicle. Click on “Edit Device” button
Or
- Click the “Devices” icon on the toolbar. Select the vehicle to be edited. Click on “Edit” button
- Click on “Change Avatar” button
- Select one of the pre-loaded images or click on “Upload your avatar” select the image and then click on “Open”
- Click on “Save Changes” button
- In the Map View, select the vehicle/device to edit. Click on the blue arrow. An information bubble will appear next to the selected vehicle. Click on “Edit Device” button
Or
- Click the “Devices” icon on the toolbar. Select the vehicle to be edited. Click on “Edit” button
- Click on “Payment Reminder” and the form will show up at the right of the screen
- Fill out and select all required information: notification method, payment schedule, reminders and notification message.
- Click on “Save Changes” button