Category Archives: Geofences

Geofences

Geofences are virtual boundaries that you can designate for tracking your vehicle. Geofences can be drawn as circles, rectangles or custom shapes. Once a Geofence is set up, you can add alerts or track when your vehicle enters or leaves that area.

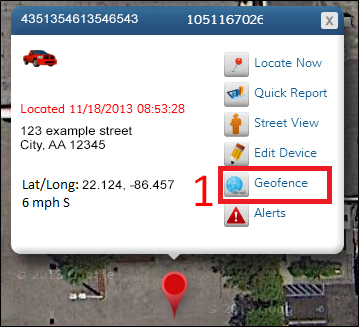
1. Click the ‘Geofence’ icon.

geofence

Creating Geofences

creating-geofences

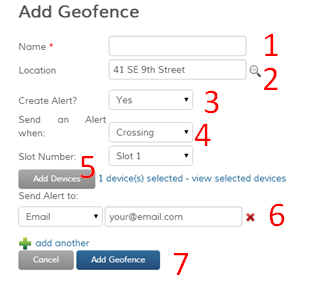
1. Name your Geofence by filling in the ‘Name’ box.

2. Locations for Geofences can be found in two ways. You can manually find the area on the map, or you can use the Find Address feature. The Find Address feature can be used by entering an address or location in the ‘Location’ box. After filling in the ‘Location’ box, click the ‘find address’ button. Now that you found your location, follow the instructions below to draw a Geofence.

3. If you would like to create an alert for this Geofence, select “Yes” from the ‘Create an Alert?’ drop-down box. If not, skip down to instructions for drawing Geofences.

4. Select when you would like to be alerted. The options are entering, exiting and crossing. By selecting “entering,” you will receive an alert when the vehicle enters the Geofence. By selecting “exiting,” you will receive an alert when the vehicle leaves the Geofence. If you select “crossing,” you will be alerted after the vehicle has both entered and exited the Geofence.

5. Click the ‘Add Devices” button and select the appropriate devices.

6. Choose how you would like to be alerted. To use email, select “Email” and enter your email address. For SMS alerts, select “SMS” and enter your phone number (no dashes) and your cell phone provider.

7. After drawing your Geofence using the steps below, click the ‘Add Geofence’ button to save your Geofence and alert.
Drawing a Circular Geofence from a location found via Find Address feature

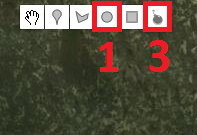
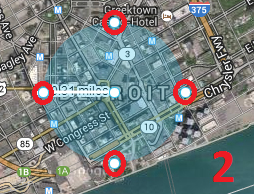
1. If you found your location through the Find Address feature, clicking the circular Geofence button will automatically create a circular Geofence around the location.

circular-geofence-B1

2. You can then adjust the size by clicking and dragging any of the four points which lie at the outer edge of the Geofence.

circular-geofence-B2

3. If you would like to erase this Geofence and create a new one, simply click the ‘Eraser’ button at the top of the map, and then follow the instructions below.

Drawing a Circular Geofence from a location found manually

circular-geofence

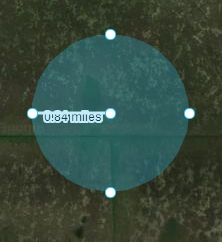
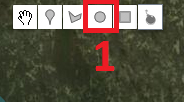
1. Click the circular Geofence button at the top of the map. Your cursor will now change to a + symbol. Click where you would like the center of your Geofence to be and drag the cursor until your Geofence is the desired size. Once your Geofence is the correct size, click again. To move the Geofence, click in the middle of the circle and drag it to the desired location.

circular-geofence-1

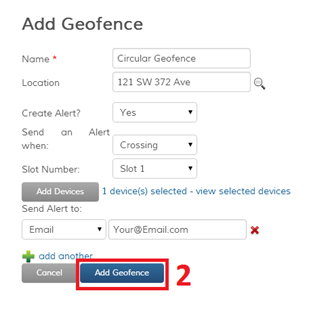
2. Click the ‘Add Geofence’ button and your Geofence will be saved.

circular-geofence-2

Drawing a Rectangular Geofence

rectangular-geofence

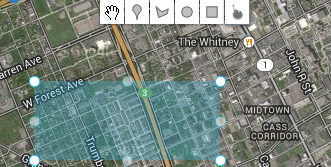
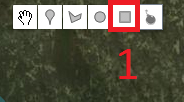
1. Click the rectangular Geofence button at the top of the map. Your cursor will now change to a + symbol. Click on the map and drag the Geofence to the desired size. Once your Geofence is the correct size, click again. To move the Geofence, click in the middle of the rectangle and drag it to the proper location.

rectangular-geofence-1

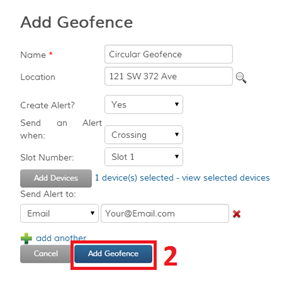
2. Click the ‘Add Geofence’ button and your Geofence will be saved.

rectangular-geofence-2

Drawing a Polygonal Geofence

The polygonal Geofence tool allows you to create a custom Geofence by connecting three or more dots.

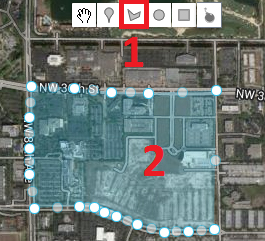
1. Click the ‘polygonal Geofence’ icon at the top of the map. Your cursor will now change to a + symbol. Click where you would like the first point on the Geofence perimeter to be. As you move your cursor, you will notice a line connected to the first point. This line shows where the Geofence perimeter will be. Click where you would like the second point to be. Then click where you would like the third point. Now, you can either complete the Geofence or continue adding points.

polygonal-geofence

2. To close the Geofence, click on the first point one more time. You will then see your Geofence highlighted in blue. You can modify the shape of the Geofence by clicking on any of the points lying on the outer edge and dragging them to the desired shape. You can also move the Geofence by clicking in the center of the Geofence, and dragging it.

Delete a Geofence

1. Click the ‘Admin’ icon.

admin

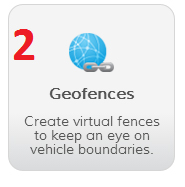
2. Click the ‘Geofences’ icon.

geofences

3. Under the Actions column, click the ‘Delete’ icon

delete-geofence-3

4. A confirmation message will open asking “Are you sure you want to delete the selected Geofences?” Select “OK” to finish deleting the Geofence.

delete-geofence-4

Edit a Geofence

1. Click the ‘Admin’ icon.

admin

2. Click the ‘Geofences’ icon.

geofences

3. Under the Actions column, click the ‘Edit’ icon.

edit-geofence-3

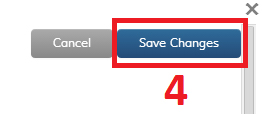
4. After you have made your changes, click the ‘Save Changes’ button.

edit-geofence-4